Home

About the Girl

DIY/Tutorials

SIPIDI Saturday

Food & Recipes

Wednesday, September 11, 2013

Peach Shortcake

September this year came with that rush of fall. Cool weather, jeans and sweaters, and of course fall scented candles were burning away. However, just like weather in upstate New York does every year, we were hit with a few days of 90 degrees. Somehow fall candles do not have the same appeal when the air conditioning is blowing away :). Like summer, I seem to be having a hard time letting go too. Part of me still wants warm summer nights, campfires, and of course summer food. Lucky for me, September gave me a few extra days to enjoy my "summer" food before I delve into the soups and casseroles that seem to always define the fall season.

One of my favorite fruits has always been peaches. Sweet, messy and delicious. Besides eating them whole, my other favorite way to eat them is with shortcake. Here's my go to recipe...I promise you won't be able to get enough!

Shortcake
4 Cups flour
1/2 Cup sugar
1 1/2 Cup Milk
2 Tablespoons melted butter
1 1/2 teaspoons almond flavoring

Bake 350 degrees for 15-20 minutes

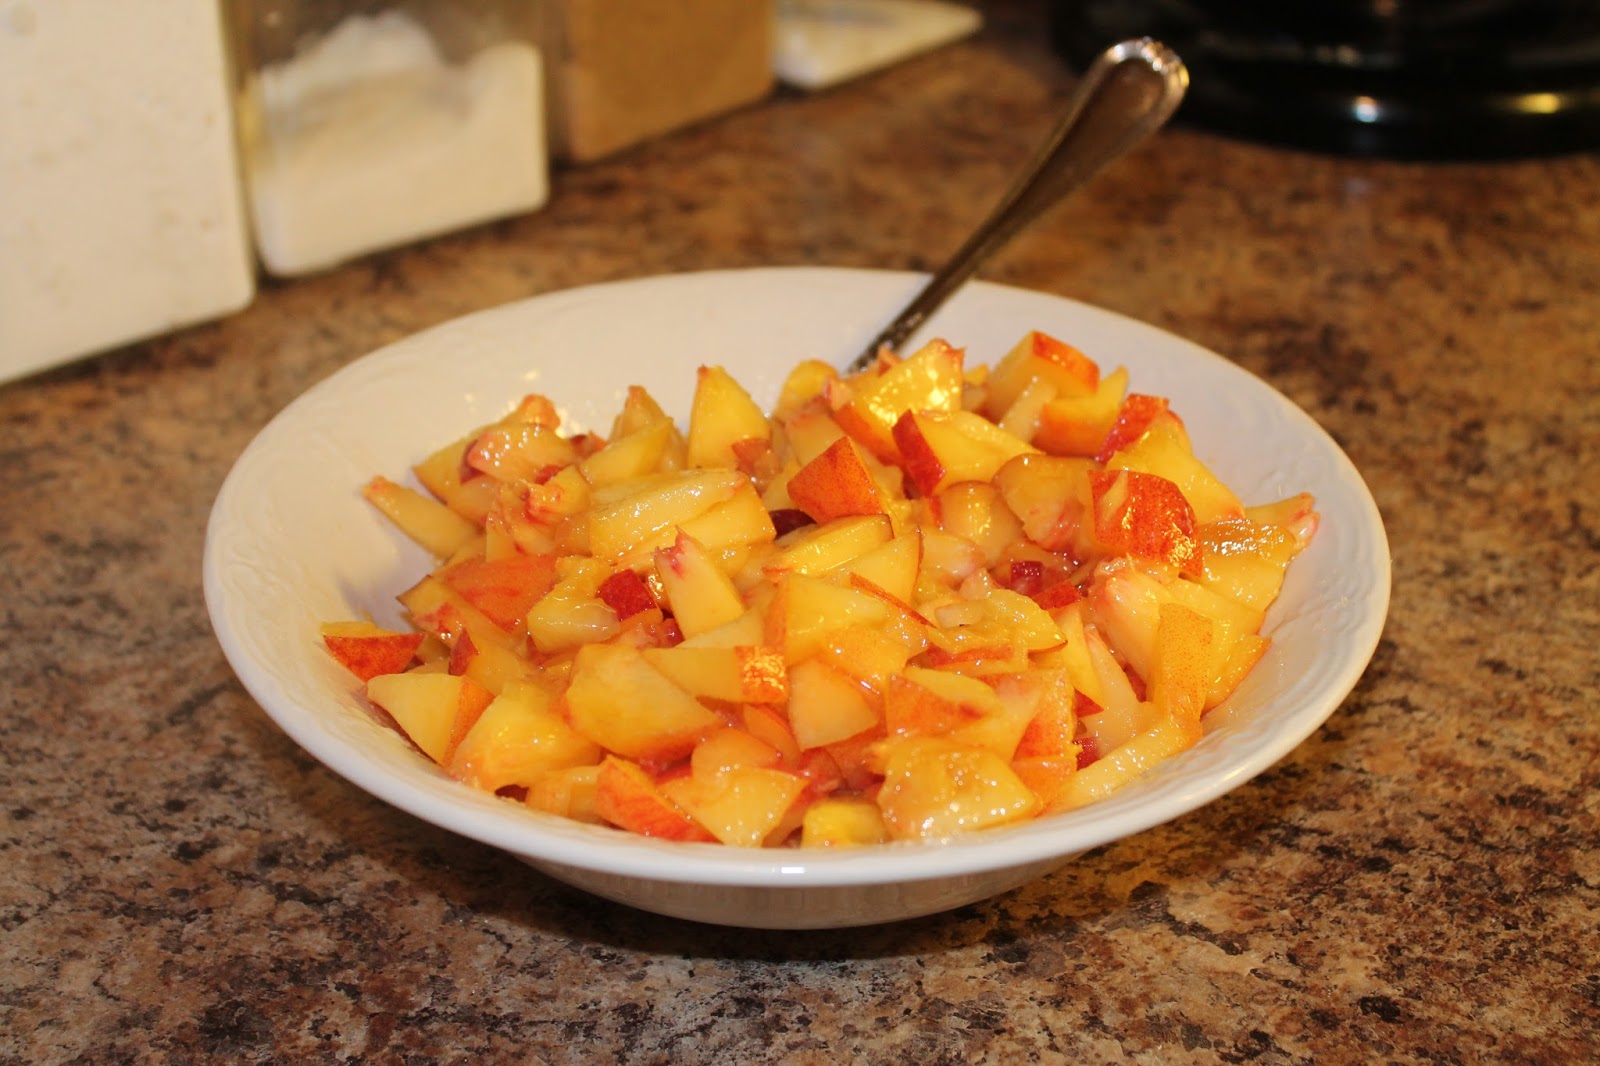
Peaches
6-8 Chopped
1/4 Cup sugar


Start by mixing the shortcake


 Plop a portion of your choice on your baking tin. I also use my trusty Silpat!


Bake at 350 for around 15-20 minutes depending on the size of your shortcake


 Wash your peaches


 Dice them up


Add your sugar


Mix it all together!


 Now add it to your freshly cooked shortcake and you are good to go!


 Whip cream or vanilla ice-cream always adds a nice touch as well


Happy Eating!


Thursday, August 22, 2013

Magazine Rack DIY

I was becoming frustrated with the pile of magazines on my coffee table. It seemed that no matter what I did they would always fall off or look sloppy, so I knew it was time to find a more permanent solution. However, I was not interested in putting them in a basket or container where I would easily forget their existence. Using an old wooden frame and some wire, I found the perfect way to display and easily find them instead!

To start out with I grabbed an old wooden frame I had hanging around. Any type of frame will do, but make sure yours is thick enough to drill holes into. Using a measuring tape start at the top of the frame and divide it into four inch sections, making small pencil marks where the holes will be drilled.

Since I'm still rather new at using a power drill I put my fabulous husband to good use and allowed him to do the drilling. He was thrilled :)


Using the pencil lines as guides he drilled a hole in each one. Since we do not have a garage to work in either he came up with an ingenious idea of using a cardboard box to hold the frame in place. Invention is truly the mother of necessity! Once the holes were drilled it was now time to thread the wire. I used floral wire (since I had it on hand) and I threaded through the entire frame twice. I wanted it to be sturdy and not bend easily.


Once strung gather up your favorite magazines and have fun! I love the fact that it easily stands up against the wall making it easy to access without taking up a lot of room!


Friday, August 9, 2013

For The Breakfast Lover: Pepperoni Quiche

I am a breakfast lover! There's just no way to beat the delicious flavors that come alongside all sorts of breakfast food. One of my favorite parts however, is when I mix it up and eat breakfast for dinner. Who hasn't done that right? One dish that is my favorite is quiche. I like how it offers the taste of breakfast, but still feels like a meal. It is also the perfect accompaniment to any brunch or lunch that you might throw as well. This quiche in particular is delicious because of the added veggies and yummy flavors added in. Hope you enjoy as well!

The original recipe can be found here, but I modified it a bit to fit my own tastes and what was available in my fridge.

Pepperoni Quiche

1 pie crust
1 red or green pepper chopped 
1 tablespoon olive oil
1 garlic clove minced
5 eggs beaten
1/2 cup shredded cheddar cheese
1 cup fresh spinach chopped
1/4 cup sliced pepperoni, cut into small pieces
1/4 cup almond milk (or any other variety)
2 tablespoons Parmesan cheese
1 teaspoon dried parsley
1 teaspoon dried basil
1/4 teaspoon pepper


Someday I'll upgrade to actually using my own crust. It's on my to-do list to learn and I'm looking forward to the challenge. However, for an easy meal to throw together grabbing one from the freezer works pretty well!


First chop up the pepper, garlic and spinach. Throw it in a pan with the olive oil and cook until softened. 


 While the veggies are cooking mix the rest together in a pan and have it ready to go.


 Mix both together and pour it into your pie plate. Bake 350 degrees for 35-40 minutes, or until knife in the center comes out clean.


Delicious!


 Time to enjoy your finished product. Trust me you won't be disappointed!


Monday, June 10, 2013

Fun with Mod Podge

I always make funny facial expressions when I saw "Mod Podge." It is the kind of word that just demands some sort of hilarity to go along with it. On the off chance that it's just all me...so be it. I might be alone, but at least you all got a good laugh as you picture me yowling moooodddgggeeeeppppoodddgggeee every time I see a bottle nearby :).

So anyway...it's been awhile! Why does life always seem to get in the way of creative pursuits? Not cool adulthood, not cool. On a positive note, one part of the craziness in my life is the fact that my brother is getting married!!!! Between showers, bridesmaid dresses, and decorations (oh my!), there will be a lot to show you and I cannot wait! However, before that all happens I have a few projects to introduce.

Today's craft was inspired by my favorite vacation spot that my family goes to every year. It has now continued to be a tradition with my husband and I, we just can't get enough! Since I have been itching to use Mod Podge, and I wanted a picture to remember our favorite place, I decided this was the perfect project to complete. 

Materials

1. Canvas - any size you want!
2. Picture - I printed this one out with my printer however, I would recommend using an actual photo (more on that later)
3. Paint brush
4. Mod Podge
5. Mat board (optional)

I spread out junk mail on the floor, but it could easily be completed at a table as it was not that messy.

Next gather your supplies!


I made the mistake of putting a thick coating on top of the canvas, but I would recommend just using a thin coat. I was afraid of not using enough to stick it to the picture, but the issue was that it created bumps in the picture instead :(


Then lightly brush glue over the top of the picture. Once again my rookie mistake was using a picture printed on paper. The glue made the colors smear a little, and it was harder to get rid of the bumps without destroying the image. I think if it was an actual photograph it would have been easier to glue without smearing.


The finished result! As you can see it did create some unwanted bumps and creases and weird discoloring, but overall I was pleased with the result. In the end I wanted to make it look a little nicer so I glued a mat board over the top.


Perfect! Now every time I do dishes I can dream of vacation :)


Sunday, March 10, 2013

Let's Go Green....Or....Orange!

In the midst of the craziness of life and school (hence my terrible month long absence) I often find new things that inspire or challenge me in my life. Somehow the craziness lends itself to inspiration in new ways...go figure. Anyway, I have been doing a great deal of thinking and reading about what we put in our bodies. Not just food, but what we use around us. Specifically what we put on our skin or use in our homes. It is a little scary when you look around and think about all the toxic things that are just in our homes alone. With that thought in mind I started looking for more ways to go more natural. However, though I wanted to go more natural, I wasn't willing to pay an arm and a leg for it either. Thankfully, I happened to bring the topic up to my Mom who commented about a cleaner she was trying out. After looking it up myself I had to try it. Easy to make, cheap, and natural. Now here's your turn to try it!

For the original recipe look here.

Ingredients:
1. Orange peels
2. Salt
3. Vinegar
4. Water
5. Glass jars (I used salsa and spaghetti jars)

To start out collect a bunch of orange peels. I kept a bag in the fridge and kept adding to them periodically. Between my husband and I it didn't take long to get enough.


Ingredients...check! Lets make some cleaner!


 As you add your orange slices to the jars, sprinkle a little salt in each time. This is supposed to draw out the oils in the peels and make it stronger. Let peels sit in the jars for about 30 minutes.


 After they have finished sitting fill each container half way with vinegar and then fill it to the brim with water. Put the lids on tight. Now find a place for them to sit for 3-4 weeks. I let mine sit for about 4 weeks and that seemed the perfect amount of time.


Four weeks later and we are ready to go! Drain the very orange liquid into a spray bottle, discard the used peels, and you are ready to clean!


I use this as a general household cleaner, but mostly for counter tops, tables and my kitchen. As a warning it does have a semi-strong vinegar smell mixed with the orange, though it quickly dissipates after use. The original recipe called for several drops of essential oils that could be put in after the solutions sits for several weeks. I have not tried it, but I would assume it would cut down on the vinegar smell as well.


Overall I have really liked using this cleaner! It has worked well in my kitchen and I love the fact that it cost literally pennies to make (since all the ingredients are staples in my house). Though it takes awhile to create I think it's totally worth it. Also, since oranges are pretty much a staple in our house I always have several jars of solution going. Once I fill a jar I put the date on the top and store it away in my pantry. As a result I have a constant supply of refills!

Happy cleaning!


Saturday, February 9, 2013

SIPIDI Saturday: Hearts on a Tree

Remember this tree?


After the hustle and bustle of the holidays faded away I decided it was time for a tree make over. After all, Valentines Day is on the way, and what could be better then some decorations to celebrate the event!?!?! After I saw this pin  I knew immediately it would be the perfect addition for my tree. Simple, easy and adorable! Here's how :)

1. Cut two strips of felt 3 in. x 9 in.


 2. Draw vertical lines 1 inch apart on one of the felt strips.


3. Place the strips on top of each other with the chalk stripes facing in.


4. Sew down one edge.


5. Once sewn flip material over so the lines are now on the outside. Sew the two open edges closed.


 6. Once everything is sewed, cut down the lines.


 7. You now have the finished heart!


8. I added a string loop to hang them on my tree and made white hearts to go with the red. The result....


Perfect!


Add a few pictures of your Valentine and you are ready to go! :)